Monday, 18 February 2013

On larp archery - packing your arrows in the quiver.

As I mentioned in the larp quiver guide this post is about packing your arrows. Someone might ask, ok so what's so difficult about packing your boffer arrows in the quiver? Well for once they are boffer arrows - they have a big foam head on the front. That's why most people simply load the arrows upside down in their quivers, like this.


Which is well and good, however when it comes to shooting, you have to turn each arrow upside down before firing, which cuts your ability to shoot fast. One way to solve this is by learning how to hold several arrows in your hand like I did, fire in volleys and then hide behind your line to reload.

The other is to fix the obvious problem with boffer arrows and quivers - the arrows being upside down.
If they are not, you can shoot much faster since every arrow you draw is ready for nocking.
Unfortunately you can't just stuff your arrows in the other way. They will get tangled with one another because of the boffer heads and you are likely to spill half your ammo if you try to pull one out. However, that problem is not without cure. The cure is to carefully arrange your arrows. In the quiver guide I mentioned that I closed the quiver with a single seam instead of sewing a bottom to it for a reason.

Here is the reason. The bottom of my quiver is exact fit for 3 larp arrows. No more, no less, no room for wiggling and tangling.


So once we load it up those 3 arrows can't get tangled and spill out. OK you'll say, but 3 arrows is a bit low right? Well, let's repeat the experiment.

After the first 3 arrows go in, another 3 are set ABOVE them. There is no room for the top 3 arrows to fall below the lower 3. You can't mix them either since the top 3 are standing higher in the quiver.

 6 arrows is more or less the usual arrow compliment for a larp archer, but we can add another 2
as a 3rd layer here, and my quiver is reaching its limit. 


When firing its simply a matter of drawing arrows layer by layer, you start with the top two then the 2nd layer and finally the last 3 arrows. You can't mix them since they stand at different height unless you are wearing your quiver on your back - the arranging is only good if you have a hip quiver.

I can still pack some extra arrows in here, placed upside down in the usual manner and simply fire them first.

How to make a simple larp quiver

Assuming you already have your bow and arrows, its time to get a quiver for them too. There are a good number of options here and what you choose is entirely up to your own preferences, not just in materials but in design as well.


First a bit of extra info. There are mainly two types of quivers - not based on design - all quivers are the same essentially, but based on how they are worn.


First you got back quivers.


And then you got hip quivers.


One is well obviously worn on your back, the other one tied to your hip(and optionally lower thigh). Which one you prefer is up to you and the way you work on your own weapon loadout. If you wear the quiver on your back you can't wear a shield there, if you wear it on your hip it will take room normally reserved for swords and knives and it might limit your movement a bit (if you don't want to spill your arrows that is. If you've fired everything you can run as fast as you want)


So how to make your own simple quiver?


You need a base - that can be leather, canvas, whatever you got. I mean a pair of old pants can do too, you will just decorate it a bit more. Fake leather is ok as well, one of the few cases where it is.

Here is for example my old training quiver(I only used it for practice) Its made from the sleeve of an old leather jacket that I had recycled already for other uses. I would not bring it to a larp proper because well, its just a sleeve with straps on it.


Anyway back on topic


Simple quiver - materials needed, either leather, canvas, or whatever you can use for the body. Something for straps. Something to sew the leather/canvas closed. 


Tools - eh, scissors, and whatever you will use/need according to materials. 

Budget - varies


 First thing to do is to measure and cut the body. I've picked leather since well I have leather available. A rectangular piece is cut, slightly shorter than the 68sm arrows. Make is as wide as you want to - it depends on the number of arrows you want. I made mine fairly big, since I plan to carry about 10+.
 After you cut the leather, close its sides, forming a cylinder. Then we need to close the bottom. Some people actually sew in an extra piece to close the bottom of their quivers. I picked a different approach by making a 2d bottom. You will see why in my next post where I will explain a little trick with arrows arrangement in the quiver.

 Fortunately I have a swiss army knife around so I managed to deal with the leather. The extra leather strip is both decoration and reinforcing.

 Once the bottom is closed, a strip of reinforcing leather is added to the top as well, for symmetry and for durability.

 After that its time to add the straps. For me thats simple shoe laces(the thickest ones) they are tough enough to survive any tension and won't rot away in bad conditions. I made sure they pass through both the body AND the reinforcing bands of leather. I decided on a hip quiver, since it can be easily turned into a back quiver if needed.


 That is how it looks from the other side. Now its ready to be worn.

To wear it, just tie the top lace to your belt, and the lower lace to your leg. Its firmly attached.


 If you want to convert it into a back quiver, just tie a belt to it like this and it can be worn on the back as well. If you want a back quiver to begin with, skip the part with the laces and get a shoulder strap directly.


 Coming up next - boffer  arrow arrangement for larp.


Tuesday, 12 February 2013

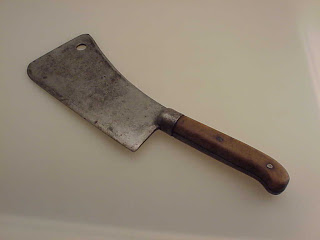
How to make a larp boffer meat cleaver.

In the previous blog post about improvised weapons, I showed a farming sickle. All that is well and good, but what other things come to mind in terms of everyday tools and items used as weapons? Let's see, lumberjack axe, blacksmith hammer, hunting bow, peasant pitchforks and flails...and a butcher's cleaver.

Its hard to argue with a 150kg butcher with a 2 foot long cleaver in one hand and a meat hook in the other. Or an equally big cook whom you've caught in his beloved kitchen while storming the castle so he naturally reaches for the first familiar choppy thing nearby...People don't generally keep swords and other stuff in the kitchen. No need - its a veritable arsenal already.


So - butcher's meat cleaver. What do we need? Eh not much really - same as usual.


First we cut the necessary length for the core then we make the handle.

The grip is similar to the one on the sickle, with the added exception - hemp string for looks.

After that the blade - which should be multi-layered.

To improve the looks - I added cardboard to the sides of it. Normally that hardens the blade, but in this case we are talking about a short weapon that's going to lack kinetic energy anyway, so we go for the looks.


 Finally - top layer of tape and we are done. We got a larp boffer meat cleaver.


How to make a larp boffer farming sickle

As I mentioned in my facebook page I'm going to make a couple of "improvised" weapons. Actually the term was a bit misleading, since I did not mean something cobbled together from a bits of scrap MacGuyver style. Actually there are an awful lot of tools of everyday life that also happen to have good weight or sharp edges and thus be quite good for chopping or clobbering someone over the head. Remember - not everyone can be a special snowflake, and hardly everyone was a mighty warrior or had a heirloom sword of power stashed in the attic. So when you are a simple farmer and those uppity orcs show up and trample your fields...well you grab the first thing that can go choppy on them, you don't wait for the army to arrive 6 days later. As it happens to be, that would be your sickle. Hell, as far it goes its a perfectly fine bladed weapon. A certain Paulus Hector Mair even had a chapter in his medieval fighting manual on sickles.


But enough about that. So you want a sickle? Lets make one!


LARP BOFFER SICKLE.


Budget: Usual for a weapon

Materials: foam, F20 pipe(you need a thin pipe or you won't be able to curve it) tapes, something for the handle.

Tools: Usual for the job AND also get a heat gun+ protective gloves. You can still use the other ways of heating the pipe, but as I discovered the heat gun is perfect.


 First thing to do would be to cut the necessary length of pipe and prepare for heat gun work.
 USE GLOVES AND CAUTION WITH THE HEAT GUN! 
Otherwise you will burn yourself or something else. So read the damn manual.

 Keep in mind - achieving the shape will probably take more than one pass. Do it slowly and steadily so that you don't damage the pipe, only bend it. As an advice - to speed up cooling put it in cold water while holding it in the right shape (or under the water tap). Thus it will get solid in the shape we want it.


After that its mostly trivial stuff. First the handle is made. Since I'm out of flip-flop pieces, I just taped a few strips of cardboard  to it.

Then I covered it with wood texture wallpaper and its on to the blade.

Keep in mind that the blade of the sickle is on the inner side. So most layers of foam and the tip(which you will be striking a lot with) should be on the inner side.


 Eventually we got our farming sickle done. Now we can have a peasant rebellion.


I say....how about lowering them taxes m'lord?

Wednesday, 6 February 2013

On roleplay, an interview that could be good for new players.

This came by from the folks at http://larpcraft.com


Overall a decent story that is good for explaining larp to new players or simply people interested in it. Go watch it. There is some good info on roleplay and its importance for a good game.