Showing posts with label larp armor. Show all posts

Monday, 21 January 2013

On armour - chainmail - the simple chainmail shirt tutorial part 1

I've made enough progress with the commissioned chainmail shirt to make part one of the tutorial on how to make your own. Mind you part two won't be coming soon - it will take me a while to get to that point.

Anyway, on the point. As stated before - homemade chainmail is the obvious choice for good quality larp armor when you are on a budget and can't afford much. However, making something big like a shirt or a hauberk is the biggest possible project you can engage with so don't take on it without previous experience.

So - chainmail body armor - what do we need?

TOOLS. - the usual for making chainmail - pliers, a cutter of some sorts, mandrel and optionally electric drill.

BUDGET - depends on the material, the size of the shirt and your local prices. The ones you see above are from galvanized wire and cost about 30$ apiece in terms of raw materials.


First of all a bit of extra info. Chainmail body armor comes in 3 main types, depending on the size, namely - vests, shirts and hauberks.


After seeing my awesome photoshoping skills, back on topic. The given numbers are rough estimates of course, based on my own experience for standard 2mm thick wire and 10mm inner diameter of the links. Mind you there are hauberks with short sleeves and shirts with long sleeves so again - the numbers could be different.

The sleeveless vest is the easiest to do and a lot of larpers don't do anything bigger. However often it gives an "unfinished" look - it depends on the rest of your costume.

The chainmaille shirt is the most widespread type. Usually it has short sleeves covering down to the upper thigh. The tutorial will be for one of these.

The chainmaille hauberk is the biggest possible project and a major undertaking. Its slow to make, and heavy to wear for most people. On the bright side - its a full set of armor that covers  your body, arms, upper legs and if you have an integrated coif - your head as well and thus it can serve as a costume on its own. Just get some feet wraps and a norman kite shield and you are good to go with a garb that will be accepted pretty much everywhere.


So, how to make your own chainmail shirt?

First of all you'll need to make a lot of rings. That involves a lot of  coils - its better to wind all or most of your wire first, instead of making some every day. It will save you time spent on dismantling and re-mantling the winding equipment. To give you a rough estimate - here is what 8-9 kilograms of coils looks like. 

If you are making a shirt you'll need about 1.5 the amount shown - if you are making  a hauberk, twice that.
Don't worry if you have left overs. They will be used elsewhere.


The chainmail shirt can be divided on several parts - the main body, the sleeves, the skirt and the sides(they are optional - depends on how big you are yourself)
We start with making the main body of the shirt. For this I made a lot of veery long chains. 22 of them at 1.5 meters long each. Mind you this is for someone smaller than me. You should make more if you broad shouldered.

This is going to be the main body of our shirt - front and back combined. Once I weave them together in a big rectangular piece as shown above, I will check if it needs another 1-2 chains to adjust the size, then simply open a hole in the  middle for the neck. In the next part of the tutorial I will measure, adjust then close the sides. If you are making a chainmaille vest, that's when you stop. 

Sunday, 30 December 2012

On armour - chainmail coif - adding the mantle of the coif


Previously we added made the body of the coif and attached it to the cap. The final part left is the mantle piece. For this I've selected a simple round bishop mantle. Here it is still piecemeal, as I'm about to join the bits together. The mantle is made of 3 rows of 4in1 strips, each strip is 3 links wide.


First row is about 60 links long - same as the circumference of the coif itself at the moment, and there  is nothing special about adding it. I also find it simpler to work over my knee for this.


After that though the diameter grows since the mantle is now falling on my shoulders, not just going down my neck. Therefore we need to expand it. This is done by adding extra rings. Again I'm using differently coloured links for example. Expansion of chainmaille sheets is done by adding extra links to a connecting line. Here I've added 1 extra copper link, per 3 normal ones. Thus the next row will be roughly 1/3 bigger, which will cover the increase in diameter. The same way you can contract the maille sheet  and the ratio is by no means set in stone. It can be different.


 Here it is again - attaching extra links to the coif before adding the second row of the mantle. They are colour coded again. The second line will be 1/3rd bigger than the first and the last one will be 1/3rd bigger than the 2nd.
After repeating the operation twice. The chainmaille coif is finished. and ready for use. Don't forget to wear an arming cap or equivalent under it.


One last detail you might add is this. While you can tailor your own coif to be perfect for your size, most of the time you want a "one size fits all" model. Thus it can often end up on a smaller head where it will be a loose fit. To fix that, I've used some thin rope to make a strap that you can use to tighten the coif to your head.

Mind you you don't have to make a round bishop mantle like this, or any mantle at all. A coif can be integrated in a hauberk, or have a square mantle or one with triangles.Like this example which I found on the net. The mantle can also be worn separately from a coif and this will be my next armour project -a mantle piece.

Monday, 17 December 2012

On armour - chainmail coif - making the body of the coif

In our quest to get cheap homemade larp armor, we started a chainmail coif and already made the top piece.


Next come parts 2&3 - the headband and the main body. These can be made together actually.First thing to do would be to take measurements. Put on a thick winter hat and then measure the size of your head from one temple to the other. This will be roughly the size of the main body. The winter hat represents padding, which you will need anyway. All in all don't be afraid to make it 2-3-4sm bigger, the extra room is necessary, its best if its a loose fit, rather than not fitting at all. Then measure the full size of your head with forehead included - thats the size of the headband.

Here is a top piece with the headband already attached. The headband is simply a band of 4in1 chainmail with the length you measured from your head earlier. Now is the time for adjustments. If the top piece is too small you should add an extra roll to it, and if the headband is too tight - make it bigger.


Next thing to do is to make the main bodies of the coif. The size should be according to the first measurement we took for width and long enough to cover all of your neck.  As you can see I am making two coifs at the same time. For the second one, headband and main body are being done together. It makes no difference really.


Then you must attach the top to the main body. I find it is easiest to do it over your knee.

Once that's done, the coif is finally taking shape. Now we need to close the lower part of the main body with a small rectangular piece of 4in1.


Finally our larp armor project has reached wearable state. When closing the main body - again make sure you can fit your head with padding on. Then you can go on to adjust the size of the face to your liking.

The last thing to do would be the mantle. There are many variants, you can even go on without one and attach the coif to an existing hauberk. I will do a simple bishop mantle for this later on.


Saturday, 15 December 2012

On armour - chainmail coif - making the top or cap of the coif.

As it was already stated - we are making a chainmail coif. The top of the coif is the most complex part, so if you get it wrong at first, don't worry. It happens to all of us.


Making the top starts with placing six links inside one closed link. This our step 1. To make it easier for you, I've colour coded each step, by using differently coloured links.
Step 2 is simple enough
 Can't make mistake on 3 either
 Step 4. Now we basically start repeating steps 3-4 until all the initial six links are used.


With this, the initial closure is done. Now you just start adding more rolls. You will have to repeat step 2 and then use step 3 to turn the corners.


Eventually you will come out with something like that. It should roughly cover the top of your head, so measure it accordingly. Don't worry if you make it too big, actually make sure there is plenty of room for hair&padding.


On armour - chainmail - the chainmaille coif

Missed me? I doubt it. Now let's talk armour again. Assuming you are looking for homemade gear, which you should be, otherwise why are you here, we've already deduced that chainmail is going to be your best friend.

If by this point you've got your basic chainmail tools  and perhaps some advanced power tools as well as enough chainmail material of the type you want. Now of course you'd want to start your first project. People tend to jump into something big first and then fail spectacularly therefore I'd advice against it - weaving maille takes a lot of time and patience and you are likely to call it quits in frustration at the slow progress. Therefore you are best starting small with something that you can finish in a few days. The experience (as well as the sense of satisfaction and achievement) will help you tackle bigger things(or to decide if you want to handle chainmaille at all).


Thus a suggested first project, is the chainmaille coif.

Why a coif?

Reason 1. The chainmail coif is a decent starters project. Its weights 1-3 kg depending on the rings and material used, and sits at roughly 2000-3000 rings, again depending on link size. Even if you do just a few hundred per day you will complete it in less than a week. It will be cheap too, regardless of what its made of.

Reason 2

The second reason to make a coif, is that its a nice audition to your larp costume. It will give your garb a sense of completion. An awful lot of folks have  great larp costumes and sets of armour, yet go around with naked heads. That is just wrong. The head protection gear was the most important piece of defensive equipment throughout history. Practically everyone wore a helmet, even the ancient greeks who sometimes had only a loin cloth a spear and a hoplite shield, did not forget to add a bronze helmet to that. Of course there are exceptions to the rule where a helmet is discouraged by the costume itself. As example below - Sigmar's priests don't wear helmets and the rather famous drachenfest orcs don't have ones either - its a matter of where your costume inspiration comes from.


They likely draw their inspiration from World of Warcraft, which is not known for any notion of realism. Its okay to let it slide, but having a fantasy costume does not mean that you should go for high fantasy and completely ignore what history has shown us. Besides there are practical examples of fantasy gear.
Take for example the Uruk Hai from the second part of the Lord of the Rings Trilogy. Plate armour providing decent protection from horse archer's short bows (elven bows are cheating), pike and shot(pike and crossbow shot) formation to break cavalry. Even the helmets had those crests which could have been a concept artist's idea, but also had the benefit of protecting the wearer from vertical slashes by cavalrymen. Practical? Certainly. Fantasy? You bet.


Reason 3

Reason 3 is simple - its a god damn health insurance policy. You are (likely) participating in a live contact game. Even if the rules are strict, even if everyone follows them to the point - accidents happen. Rather than count on Lady Luck, you should tip the scales your way. A coif, combined with some padding, will protect your head and neck, without reducing your vision. Even then, there are coifs that cover half  your face as well.


So, I believe you are convinced by now. On the point - a coif consists of several pieces. The top or cap,  the headband, the main body and the mantle.The top is made of expanding weave, the headband and main body are simple sheets of 4 in1 european which was already described here and the mantle is made from 4in1 strips with expansions set. You can start a coif from either the headband/main body or the top. The mantle is best done last.
In this case, we are going to start our project with the top or as its also known cap of the coif..


Oh yes - there are photos here taken from the internet, the rights belong to their respective owners.

Wednesday, 3 October 2012

On armour - advanced chainmail tools.

In the previous post about chainmaille tools, I mentioned only hand tools that you can use everywhere at any time. Even if its in the middle of the nigh, nobody will know or care since you make no noise. However that good may be though - making everything by hand is time consuming and takes a lot of effort, not to mention blisters.

Unfortunately the 99% of us will never be the Ringlord, with his custom built and unique machinery that takes uncoiled wire from one end and produced finished butted or welded chainmail from the other.


Still, that does not mean we can't save ourselves some time right?

There are 3 processes of production in chainmaille.

1 - winding coils

2 - cutting the coils into rings

3- weaving the rings.

For your average hauberk, winding the coils will take you 1 day, cutting them into rings 2-3 days and weaving at at least 1000 rings per day would end you with roughly 2 weeks of production time. Obviously it will be nice to shorten that. The easiest to do is to start power winding the coils.

You will only need a drill with a variable speed option.(The ones that power up the harder you press the button)


There are a number of various designs for coil winding sets involving a drill. You can find them on the net or improvise yourself. I myself use a piece of pipe (same I use for weapon cores actually) held in a vice. I'll show some of these later on. The result though is roughly 10 times faster winding. Basically for 1-2 hours you will wind the coils for a chainmaille hauberk or shirt which is quite the improvement from 1-2 days. As with all electric tools though, you should be careful and wear gloves and perhaps glasses, just in case.

That eliminates process 1.

Next one is cutting. the rings. Here the water gets murkier unfortunately. A number of possibilities exist.

The store bought option is the so called Ringnator its a ring cutting machine, that can work with various metal types though its best for soft stuff - aluminium, copper and so on.

It has variations that require an outside motor - a drill in this case or ones that come with their own. I know it looks like it was made in someone's garage and that's because it is, however those things apparently work and people use them. The problem at hand is the price. The Ringinator costs about 500$ and when you add shipping, it will cost you the same as buying 2-3 finished hauberks online.


To put it otherwise its a fairly major investment and that makes it unsuitable for small scale work. However if you say, are getting one for common use by your entire larp group things start to look different, assuming your group is 40-50 people, everyone donating 10 bucks for the common good doesn't sound so bad now is it? I honestly don't know whats the situation with the extra blades for this thing and how easily they wear out.  There are also homemade rigs, that employ similar process of work. I'm not that much of a handyman, though if you believe you have the technical skills and know-how feel free to make one yourself.

Such rigs can also be made with a jigsaw. I've seen it work and I know it can be done but there are low points too. Jigsaws are noisy and make a lot of sparks, which means that you need a special environment to use them, you can't just set it in your bedroom, and using gloves and protective glasses is absolutely necessary. Also the discs will wear out - roughly 1 for every 4-5-6-kg of rings depending on the ring size etc. That adds extra production cost which makes jigsaw cutting less appealing.


Anyway, that's the two options I know of speeding up process number 2 - cutting the rings.

Finally we come to the last one - weaving the rings. Alas, only the Ringlord has the means to speed that one up as you can see on the video above. Only way I know of making chainmaille faster is by involving more pairs of hands in making it. If several people get on with it and separate the labour you can do quite a lot in a very short time.

Wednesday, 26 September 2012

On armour - chainmail - materials needed

Right then, assuming you got your tools, now you need your supplies. I already mentioned buying online, so we are thinking of the other option now.

There are a number of things to consider when getting your supplies -how may people you want to kit out, material type, price etc...


The most widespread and commonly used material for homemade chainmail is the galvanized steel wire. Its used in fences etc and fairly easy to find. Its dirt cheap - a hauberk (knee-length long sleeved chainmail) will cost you 25-30$ in materials and there will probably be leftovers for a coif. Its also fairly resistant to corrosion - my own hauberk has seen use since 2009, through rain wind and snow without taking any corrosion related damage at all. And of course above all - its very easy to acquire in large quantities. The most common size used is 2mm wire. Don't ask me how much is that in the gauge system, check it yourselves.
You can use 2mm galvanized wire for everything. Chainmail shirts, coifs, helm aventels, battle bikini, chains, decorations and so on. Its your most common material and thus applies everywhere. You could find it in the local handyman store, though its likely the price would be high and the quantities low. Best option is to buy in bulk from a construction materials warehouse. Remember what I said about pooling in? Please do that, then send a guy with a car to such a warehouse to buy say...100-200kgs of wire. 100kg will be enough to outfit 4-5 guys from head to toe, or more if its partially. Its simpler this way.


Next possible material is aluminium wire. Now that is a notably less common material. It also has different qualities and price tag to it. For starters its 1/3rd the weight, which is a very notable bonus. Its equally corrosion resistant and well...shiny, that is if you like shiny stuff. Now the downsides - while its light weight, aluminium is also much weaker. Its easy for rings to pop open and fall, so expect regular damage. If you make an aluminium chain shirt, you'll have to reinforce the shoulders with steel rings, since aluminium ones can't support the weight. One more thing - it leaves smudges, and finally comes the price tag. While its only 1/3rd the weight of equal steel wire,aluminium is also 4-5 times the price tag per kg so its a bit more expensive too.

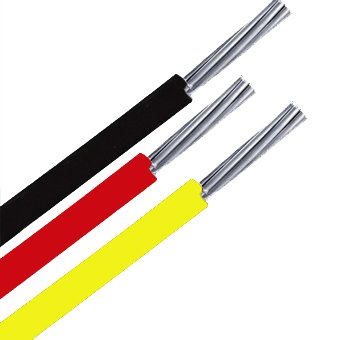
I really can't say much about finding it though. My own source is asking a person in another town to bring me some, and well thats it. What he brings me is this - its basically conductor wire without the insulation. I have to unwrap it first then turn it into chainmail. Again look for warehouses etc. It all depends on your local area.


Last one is the "exotic" stuff. Anodized rings and so on. Decoration is the word of the day here. You will probably have to buy them online though.There are exceptions though. You could find such rings in ....newsflash - jewellery supply stores. They won't come cheap either but you could make a piece of golden chainmail bikini for say the price of a full sized chainmail shirt.Using them for larger project is going to be hellishly expensive. Not to mention you are very unlikely to find enough of them in 1 store.


Tuesday, 25 September 2012

On armour maintenance

While the large weapons projects are stalling again, I see no reason to keep back with other stuff. I was thinking of keeping armour for later, but there is no reason to do so - after all I will index it all eventually.

Anyway, what I want to talk about now is larp armour maintenance. If all you have is a tunic, maintenance for you is a matter of laundry work and occasionally needle and a thread. However if you have any kind of metal, things are not so easy. Chainmail does not count - the vast majority of it is from galvanized wire which is quite resistant to corrosion, but more on chainmail later.

No, we'd talk about good olde plate mail of various sorts.

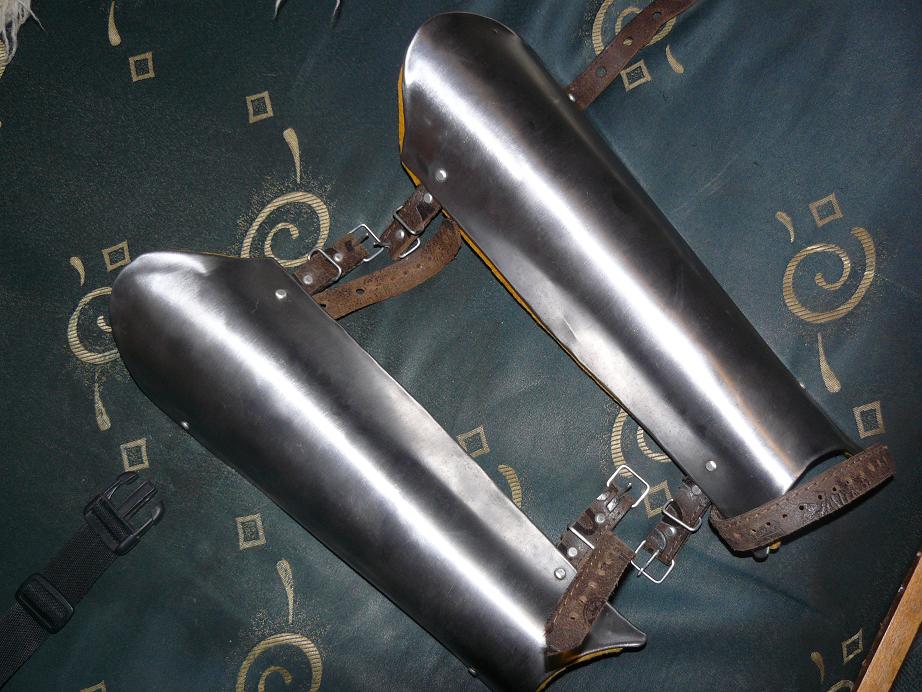
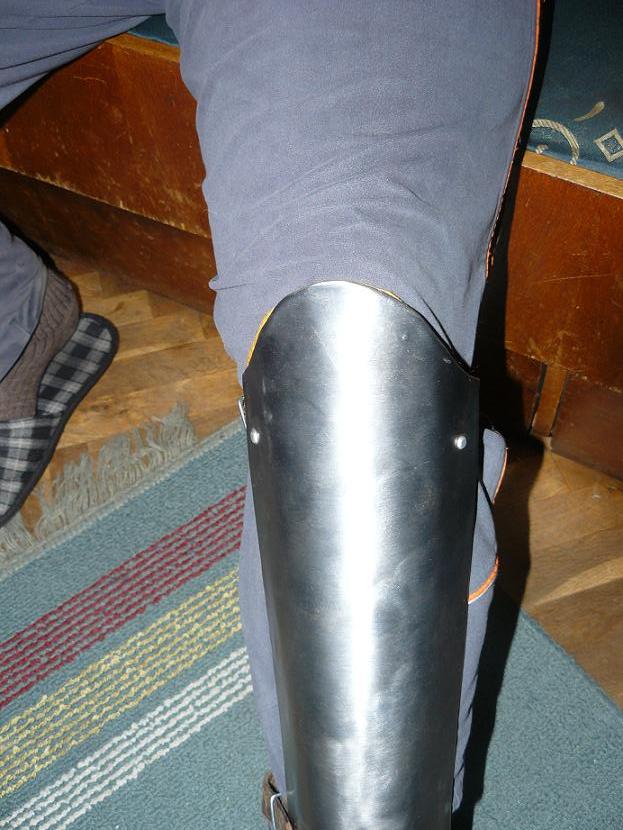
Lets take for example my shin guards.


They were nice and shiny the day I got them. That however, was quite a while ago.

This is how they look nowadays. Far cry from the old days isn't it?

Like it or not, larp armour is actually used, usually fairly often and not in the optimum conditions for keeping rust away - fighting in rain, mud and snow is not uncommon. Reenactors and such have far less occasions that require their full gear and thus have less issues with keeping it fresh.

So yeah, point is - plate mail requires maintenance. Normally that's what squires, arms bearers and other such support personnel would do. However most of us are lacking such commodities and have to deal with it ourselves. FORTUNATELY we do have other commodities, namely the products of modern chemistry.


Basically you got several options depending on the amount of effort and money you got available and the looks you want.

One of the simple solutions is paint or lacquer. Simply cover it once and you are good for quite a while - just don't forget to repaint scratches. That however means you probably won't be shiny and involves some expense.

You could skip on the chemistry and simply clean any rust that appears - possible but you will erode your plate that way - it will become thinner and thinner with time.

Since I'm a cheapskate, I simply covered it with lacquer once and let it this way. A thin layer of rust has formed indeed, and it keeps it from rusting more. Thats the 0 maintenance route, but I'm not chasing shiny looks.

Best way would involve a good ammount of WD-40 and/or similar products and cleaning and covering with fresh oil layer after every use. It will keep your stuff intact but it involves regular maintenance expense.


I'm not going to recommend any of it, since it all involves various preferences and ability. Its all up to you to decide how you want to look, and how much you want to spend on it. I prefer playing a common soldier and thus rust actually adds to my looks, rather than take away.