Showing posts with label larp gear. Show all posts

Friday, 19 October 2012

How to make a basic larp boffer spear

Spears, halberds, poleaxes, and so on, are a bit more specific to make than one handed weapons obviously. Main issue is getting a good core for the job. When talking spears there are several types and sizes, that have different approach for them.

 First are short one handed spears.


A short spear would not be much different from the javelins - in fact if you only follow the same guide but make it a bit bigger (f25 core and say 1.2-3sm size) and you will get a nice dual purpose weapon - stabbing spear that you can also throw when needed.


Next are full sized fighting spears - you can use those with either 1 hand or 2 hands but they are usually not suitable for throwing. This guide is about them.


Finally you got pikes - 3 meters+. Pikes are a dedicated formation weapon, making them would be a problematic, let alone finding enough people for a pikemen square. Never encountered it so I got nothing to say about pikes.


So how would you got about making your basic simple spear? First of all materials needed.

BUDGET: around 20$ - the large pipe is a bit expensive.

MATERIALS

Core is an F32 polypropilene pipe, a piece of foam, tapes and some wood textured wall paper to decorate the spear shaft.

Note. The problem with polypropilene for long weapons, is that the longer the core, the more wobbly it becomes, effectively giving the so called spaghetti spear effect. The simplest way to counter that is to use a thicker pipe for a longer weapon and it works to a point. For weapons up to 1 meter something - f20 and f25 pipes are ok, for up to 1.5 meters f 32 is ok, but for bigger, its not enough and the f40 diameter pipe is I'd say a bit too big. The wobbling in spears and polearms can be solved by inserting something else inside the core - basically that's why I postponed making the spear guide, I was looking for something suitable. Alas I found nothing so far so i'll show it in the polearm guides later on.

Tools are the usual for every larp weapon.

A spear is actually remarkably easy to make, finding a suitable core is harder.


First thing to do would be to prepare the spear shaft. The core is 2 meters long and a suitable piece of wallpaper is cut for it.


And then wrapped around....After all it should look like a spear right?

 Here's the shaft in full size. Can't take photos of it elsewhere - its too long.
 The rear end I covered in tape. Some folks might turn it into a spike and thus make both ends of the spear useable, I'll pass on that for now.


Next thing to do is the spear head. NOTE  This is a SPEAR - not a polearm, not a naginata - a SPEAR. Its meant for stabbing only, not cutting and slashing, so don't try to wallop the other guy over the head ok? 

Now that we got that bit out of the way, back to the spearhead. Obviously, since you will be stabbing all the time, not occasionally as with swords, the head needs to be reinforced. You can't get away with something the size and thickness of a sword blade&tip.


 Thus the spearhead will be thicker and with a fortified tip - I got 3 layers of foam on it, and then the final one giving it the pointed shape.
 After the foam layers are placed on, the final two pieces are cut to give it a pointed edge. Not too much since constant use will flatten it anyway, just enough to make it look decent.
 With the spearhead finished you only need to cover it in tape and its done.
There is you basic spear in full size.

Tuesday, 9 October 2012

Basic larp costume - the benefit of trift stores and flea markets

After the doctor diagnosed me with periathritis of the shoulder yesterday, I did the only logical thing a larper can do in the circumstances. I went shopping. Unfortunately shopping for me doesn't mean going to the mall  squeaking and buying $100 t-shirts. First I went to a local hunting shop and bought myself a $200 hungarian recurve bow just to show my periathritis I mean business. The bow is by the way Awesome with a well deserved capital letter and you will likely see additional blog posts on archery tips, a review as well as a quiver guide in the mostly foreseeable future, depending on how fast my shoulder heals. 


Anyway after that well deserved treat I went to the flea market. Did I ever mention flea markets are a gold mine? No? OK let me say so now, flea markets, trift stores, second hand shops are all gold mines. Old leather jackets are the cheapest source of real leather you will find but they are only the tip of the iceberg.
The next very useful thing you can find cheap is tough leather belts. And god is my witness you will need belts all the time.
Well maybe not THAT many belts, but for example - I have four - one for my hauberk, one for my coat of plates, one weapons belt and another for the waterskin and purse. Can't cut that number any lower, so I was naturally happy to get a pair of real leather heavy duty belts. You know there is strong, then there is Army strong and then there is Soviet army will work all day every day just add bullets strong. That was ten bucks well spent, the big one can probably support my full weight.


But the real gem and I should really have bought the two of them not just one, is an old rifleman's ammunition pouch for bolt-action rifle clips.  To put it simple - best 5 bucks I've spent in a while. They are for the lack of a better word - perfect for the task. Tough as a pair of old boots(and made from the same material), easy to hang from your belt and great addition to any character. The bonus point(questionable some might find it a minus) is that its old and well worn, it lacks the fake plastic look that comes with most items in online stores.


As for the possible uses, well there are two(3 really if you decided to do both)

One is to use it for purely RP safekeeping - trinkets, valuables, your coin, a potion or two(and yes I made another potion from a mini bottle) can be kept fairly safely inside and will certainly be less intriguing to some people than a jiggling coin purse on your waist. 

 Another possibility is to use it for keeping off game items - in my case keys, some aspirine, perhaps a couple of bandaids and a swiss army knife. Alas my magical talking stone (i.e. the phone) is just a bit too big to fit in. Perhaps if I oil the leather to soften it a bit, it will work. Normally people should not carry their phones as well - there is nothing more irritating that a call coming in the middle of a fight. Still having one or two around for emergencies is a wise idea and the tough leather pouch can keep it safe during the game.
Of course you can always do both and keep ingame items in one and offgame items in the other pouch.
Once I get another some free time I'll go search for new finds.

Wednesday, 26 September 2012

On armour - chainmail - materials needed

Right then, assuming you got your tools, now you need your supplies. I already mentioned buying online, so we are thinking of the other option now.

There are a number of things to consider when getting your supplies -how may people you want to kit out, material type, price etc...


The most widespread and commonly used material for homemade chainmail is the galvanized steel wire. Its used in fences etc and fairly easy to find. Its dirt cheap - a hauberk (knee-length long sleeved chainmail) will cost you 25-30$ in materials and there will probably be leftovers for a coif. Its also fairly resistant to corrosion - my own hauberk has seen use since 2009, through rain wind and snow without taking any corrosion related damage at all. And of course above all - its very easy to acquire in large quantities. The most common size used is 2mm wire. Don't ask me how much is that in the gauge system, check it yourselves.
You can use 2mm galvanized wire for everything. Chainmail shirts, coifs, helm aventels, battle bikini, chains, decorations and so on. Its your most common material and thus applies everywhere. You could find it in the local handyman store, though its likely the price would be high and the quantities low. Best option is to buy in bulk from a construction materials warehouse. Remember what I said about pooling in? Please do that, then send a guy with a car to such a warehouse to buy say...100-200kgs of wire. 100kg will be enough to outfit 4-5 guys from head to toe, or more if its partially. Its simpler this way.


Next possible material is aluminium wire. Now that is a notably less common material. It also has different qualities and price tag to it. For starters its 1/3rd the weight, which is a very notable bonus. Its equally corrosion resistant and well...shiny, that is if you like shiny stuff. Now the downsides - while its light weight, aluminium is also much weaker. Its easy for rings to pop open and fall, so expect regular damage. If you make an aluminium chain shirt, you'll have to reinforce the shoulders with steel rings, since aluminium ones can't support the weight. One more thing - it leaves smudges, and finally comes the price tag. While its only 1/3rd the weight of equal steel wire,aluminium is also 4-5 times the price tag per kg so its a bit more expensive too.

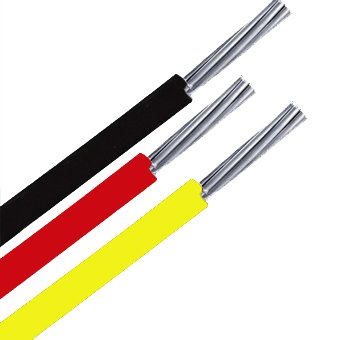
I really can't say much about finding it though. My own source is asking a person in another town to bring me some, and well thats it. What he brings me is this - its basically conductor wire without the insulation. I have to unwrap it first then turn it into chainmail. Again look for warehouses etc. It all depends on your local area.


Last one is the "exotic" stuff. Anodized rings and so on. Decoration is the word of the day here. You will probably have to buy them online though.There are exceptions though. You could find such rings in ....newsflash - jewellery supply stores. They won't come cheap either but you could make a piece of golden chainmail bikini for say the price of a full sized chainmail shirt.Using them for larger project is going to be hellishly expensive. Not to mention you are very unlikely to find enough of them in 1 store.


Wednesday, 15 August 2012

How to make homemade larp potions

In the previous post on the alchemist props I mentioned potions as the "classical" result of his doings. However - items from a chemistry will be a poor choice to make larp potions from. They are fragile, expensive and hard to replace. Buying a whole chemistry set only to use the vials is a bit counter productive.

So - how to get cheap easily replaceable and sturdy larp potions?

Well - here is a simple answer that costs roughly 2$ a piece.  I'm not going to give tools and materials list since they depend on how you want to decorate them. I used some canvas, thread and glue, but leather, paper labels and so on are not out of the question. In fact I might do a small collection of potions with different decorations as an example. For now though - I got only one.

 
The one main "ingredient" though is this. Its a whiskey mini bottle. We call them bullets(since they contain exactly one shot...get it ;) )  You are most likely to find them in the 24/7. In this particular case I picked a mini JB bottle - Its small, cheap and above all - made from plastic. That means it won't break no matter what. Naturally this is a magic potion by default but I drank the fire water already. Other types can be used as well - I simply found this one first.
First thing to do was the scrub the glue from the label and prepare it for decoration. Here we get to the wild card. You can use canvas, leather, paper, thread, a cork too. Whatever rocks your boat. In my case - I used canvas and thread.
I glued some canvas on the body of the bottle and while it was still drying up - grabbed some orange thread I have here. Same used in the leather mitten guide.
 Gotta be careful with the glue of course you don't want to poison yourself or glue the bottle shut. Apart from that - in a couple of minutes its all dried up and ready for use.
 This took me just a couple of minutes to make. You can turn out a dozen in half an hour.