Showing posts with label larp costume. Show all posts

Sunday, 3 January 2016

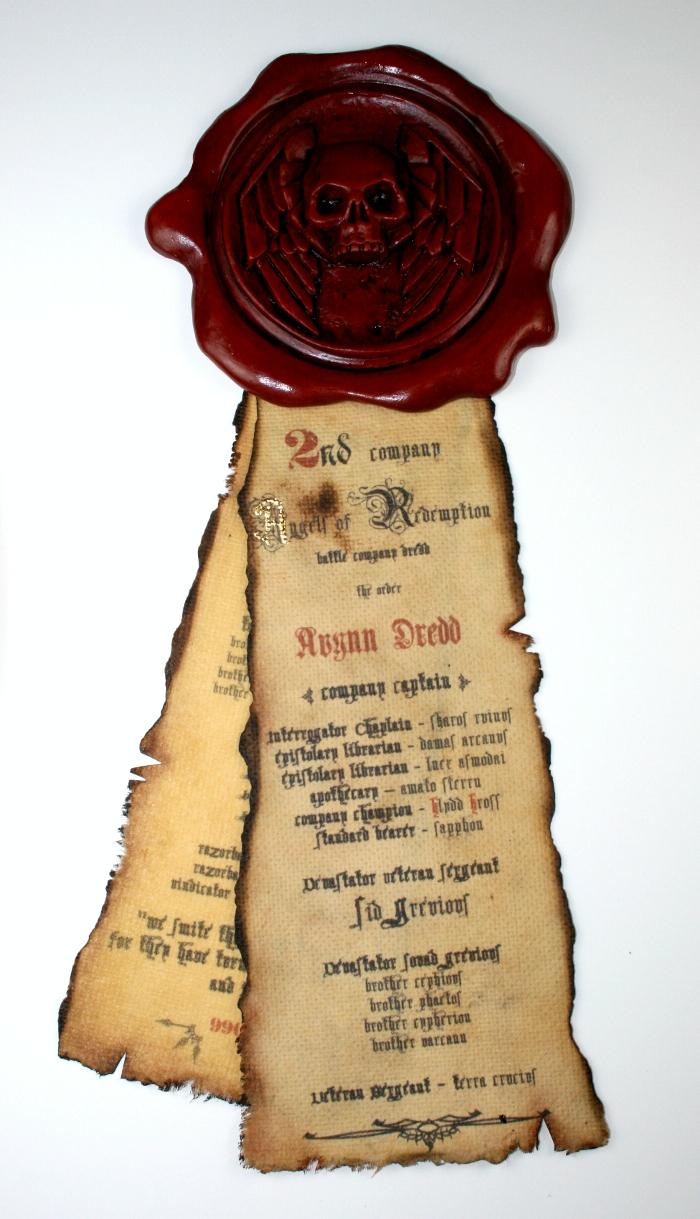
How to make cheap and replaceable seals and purity seals

A wax sealed letter is cool, besides you will always know if someone has been reading your private correspondence in LARP. Plenty of people love the staple of both Warhammer universes - the purity seal.


You can always use actual wax and a candle, however those might not always be available, especially out in the field. Besides, unlike cosplay, in larp you can on occasion expect your kit to be damaged, lost or even gifted away. This means that a cheap, easy to make and recycle alternative would be nice.

I recently tried and had no problems using something much simpler - common red playdoh.

Unlike wax seals - you don't need fire, and it can be recycled at any time - just reshape it and stamp it again. Wax on the other hand is harder to reshape and remove.

A simple example piece which i stuck on my wardrobe.


Thursday, 3 January 2013

On armour - chainmail - separate mantle

The chainmaille mantle does not need to be part of a coif. It can (and is) worn separately as well. It is also another good candidate for first project since its even smaller than the coif - standing at about 1800-2000 links its something that you can do in about a day or two by yourself - you won't have to shanghai your family for the job.


You can find 3 uses for it, depending on your local larp rules.

 1 Since it only covers the neck and shoulders often it will not always be counted as armour. Some larps have rules about coverage. In those cases it will be an addition  to your costume.

2  If it can count as separate armor piece - by all means use it as such.

 3 Or you can use it as a supplement to your other armour. Case in point here is a photo of bulgarian reenactors where the guy with the breastplate is using a mantle not unlike the one above to protect his lower neck and shoulders.


 Same thing here except this mantle piece is made of 6in1 european and also goes up like a collar to act as a gorget and protect the throat as well.


 Basically in anything that goes after transitional armour you can find a use for a chainmail mantle piece. 


So enough chit chat - on the topic.

You'll need basic tools, about one, one and a half kilograms of links. We will basically do the same thing shown in the mantle piece guide for coif, except this time we have 4 rows.

 Here are the strips in almost finished state.

And finally the finished mantle piece.

You might consider adding a couple of laces to your garment to keep it in place, especially if you are running around a lot. Which you will be if you are a fighter...


Again some of the photos are taken from the internet and belong to their respective owners. 

Sunday, 30 December 2012

On armour - chainmail coif - adding the mantle of the coif


Previously we added made the body of the coif and attached it to the cap. The final part left is the mantle piece. For this I've selected a simple round bishop mantle. Here it is still piecemeal, as I'm about to join the bits together. The mantle is made of 3 rows of 4in1 strips, each strip is 3 links wide.


First row is about 60 links long - same as the circumference of the coif itself at the moment, and there  is nothing special about adding it. I also find it simpler to work over my knee for this.


After that though the diameter grows since the mantle is now falling on my shoulders, not just going down my neck. Therefore we need to expand it. This is done by adding extra rings. Again I'm using differently coloured links for example. Expansion of chainmaille sheets is done by adding extra links to a connecting line. Here I've added 1 extra copper link, per 3 normal ones. Thus the next row will be roughly 1/3 bigger, which will cover the increase in diameter. The same way you can contract the maille sheet  and the ratio is by no means set in stone. It can be different.


 Here it is again - attaching extra links to the coif before adding the second row of the mantle. They are colour coded again. The second line will be 1/3rd bigger than the first and the last one will be 1/3rd bigger than the 2nd.
After repeating the operation twice. The chainmaille coif is finished. and ready for use. Don't forget to wear an arming cap or equivalent under it.


One last detail you might add is this. While you can tailor your own coif to be perfect for your size, most of the time you want a "one size fits all" model. Thus it can often end up on a smaller head where it will be a loose fit. To fix that, I've used some thin rope to make a strap that you can use to tighten the coif to your head.

Mind you you don't have to make a round bishop mantle like this, or any mantle at all. A coif can be integrated in a hauberk, or have a square mantle or one with triangles.Like this example which I found on the net. The mantle can also be worn separately from a coif and this will be my next armour project -a mantle piece.