Showing posts with label instructable. Show all posts

Wednesday, 12 September 2012

How to make a larp boffer bastard or hand and half sword

Now the bastard sword, longsword or hand and half sword, or however you want to call it since all those names actually refer to a pretty large family of swords used throughout medieval Europe for a decently long period of time is another less common larp weapon. What makes it different from one handed sword is mostly not the blade but the larger grip made to accommodate two hands. When it comes to larp - its a jack of all trades and master of none. It lacks the pure ooomph power of the dedicated greatswords, or the speed of the one handed arming swords, but takes a bit of both, leaning to either side of the spectrum, depending on how you design it. In size it ranges from about 100 to 120sm - longer variants are dedicated two handed weapons and people will probably call you out if you swing it with one hand.


In terms of construction it does not differ from the arming sword - its just a bit bigger, so this guide will be quite short. Here you can see a size comparison between the ordinary sword, the bastard sword and the claymore.

Materials tools and supplies, I believe I don't have to explain again. The core is an F25 polypropilene pipe - 1 meter long.

 When making it, measure the size of the grip well - its supposed to be big enough for two hands.


After that - its business as usual, same as the other guides. A counter weight and pommel are added.

 The grip is covered in leather. I used two types of leather this time. Normally my swords are very plain and lacking in decoration, I decided to indulge myself this time around.

The sword guard I made exceptionally thick this time, with even more layers of plastic than the claymore. I'd say you will have to rely on it, and well, it should be at least a bit reliable right?
 About the blade...well there is nothing extraordinary about it - make it as you make any other. My only advice would be - don't trim the foam too much. Its a sword that you will occasionally use with both hands and you may feel tempted to hit someone with a bit more force than needed. Best to be safe than sorry. Also the tip on this one is a bit long - that's why its 120sm, I might trim it a bit later.
Well, that's pretty much it I guess.

Wednesday, 15 August 2012

How to make homemade larp potions

In the previous post on the alchemist props I mentioned potions as the "classical" result of his doings. However - items from a chemistry will be a poor choice to make larp potions from. They are fragile, expensive and hard to replace. Buying a whole chemistry set only to use the vials is a bit counter productive.

So - how to get cheap easily replaceable and sturdy larp potions?

Well - here is a simple answer that costs roughly 2$ a piece.  I'm not going to give tools and materials list since they depend on how you want to decorate them. I used some canvas, thread and glue, but leather, paper labels and so on are not out of the question. In fact I might do a small collection of potions with different decorations as an example. For now though - I got only one.

 
The one main "ingredient" though is this. Its a whiskey mini bottle. We call them bullets(since they contain exactly one shot...get it ;) )  You are most likely to find them in the 24/7. In this particular case I picked a mini JB bottle - Its small, cheap and above all - made from plastic. That means it won't break no matter what. Naturally this is a magic potion by default but I drank the fire water already. Other types can be used as well - I simply found this one first.
First thing to do was the scrub the glue from the label and prepare it for decoration. Here we get to the wild card. You can use canvas, leather, paper, thread, a cork too. Whatever rocks your boat. In my case - I used canvas and thread.
I glued some canvas on the body of the bottle and while it was still drying up - grabbed some orange thread I have here. Same used in the leather mitten guide.
 Gotta be careful with the glue of course you don't want to poison yourself or glue the bottle shut. Apart from that - in a couple of minutes its all dried up and ready for use.
 This took me just a couple of minutes to make. You can turn out a dozen in half an hour.


Wednesday, 8 August 2012

How to make a larp boffer fighting axe

Hello everyone, sorry for the long hiatus. For today we have one of the last one-handed weapon types left. The fighting axe. Now this guide won't be covering the whole process from start to finish, since it shares a lot of similarities with the guide on making a war hammer.  Therefore I'll basically pick it up from the point where the two are starting to branch off.


I'm not going to repeat the whole mumbo jumbo about tools, supplies and budget since its the same as before. Just make sure you are using a stronger core (F25)- too thin pipes will bend a lot.

What you want to do - is follow the warhammer guide until  the point where you start shaping the head.  For the record, here I'm recycling an old weapon again so I kinda start halfway finished. Yeah I'm big on recycling if you haven't noticed by now.

The head is for a single edged axe, if you want you can make it double edged - its not an issue. What you need to do though, is make sure the head is one idea tougher than the warhammer - since its bigger it has to be stronger as well.


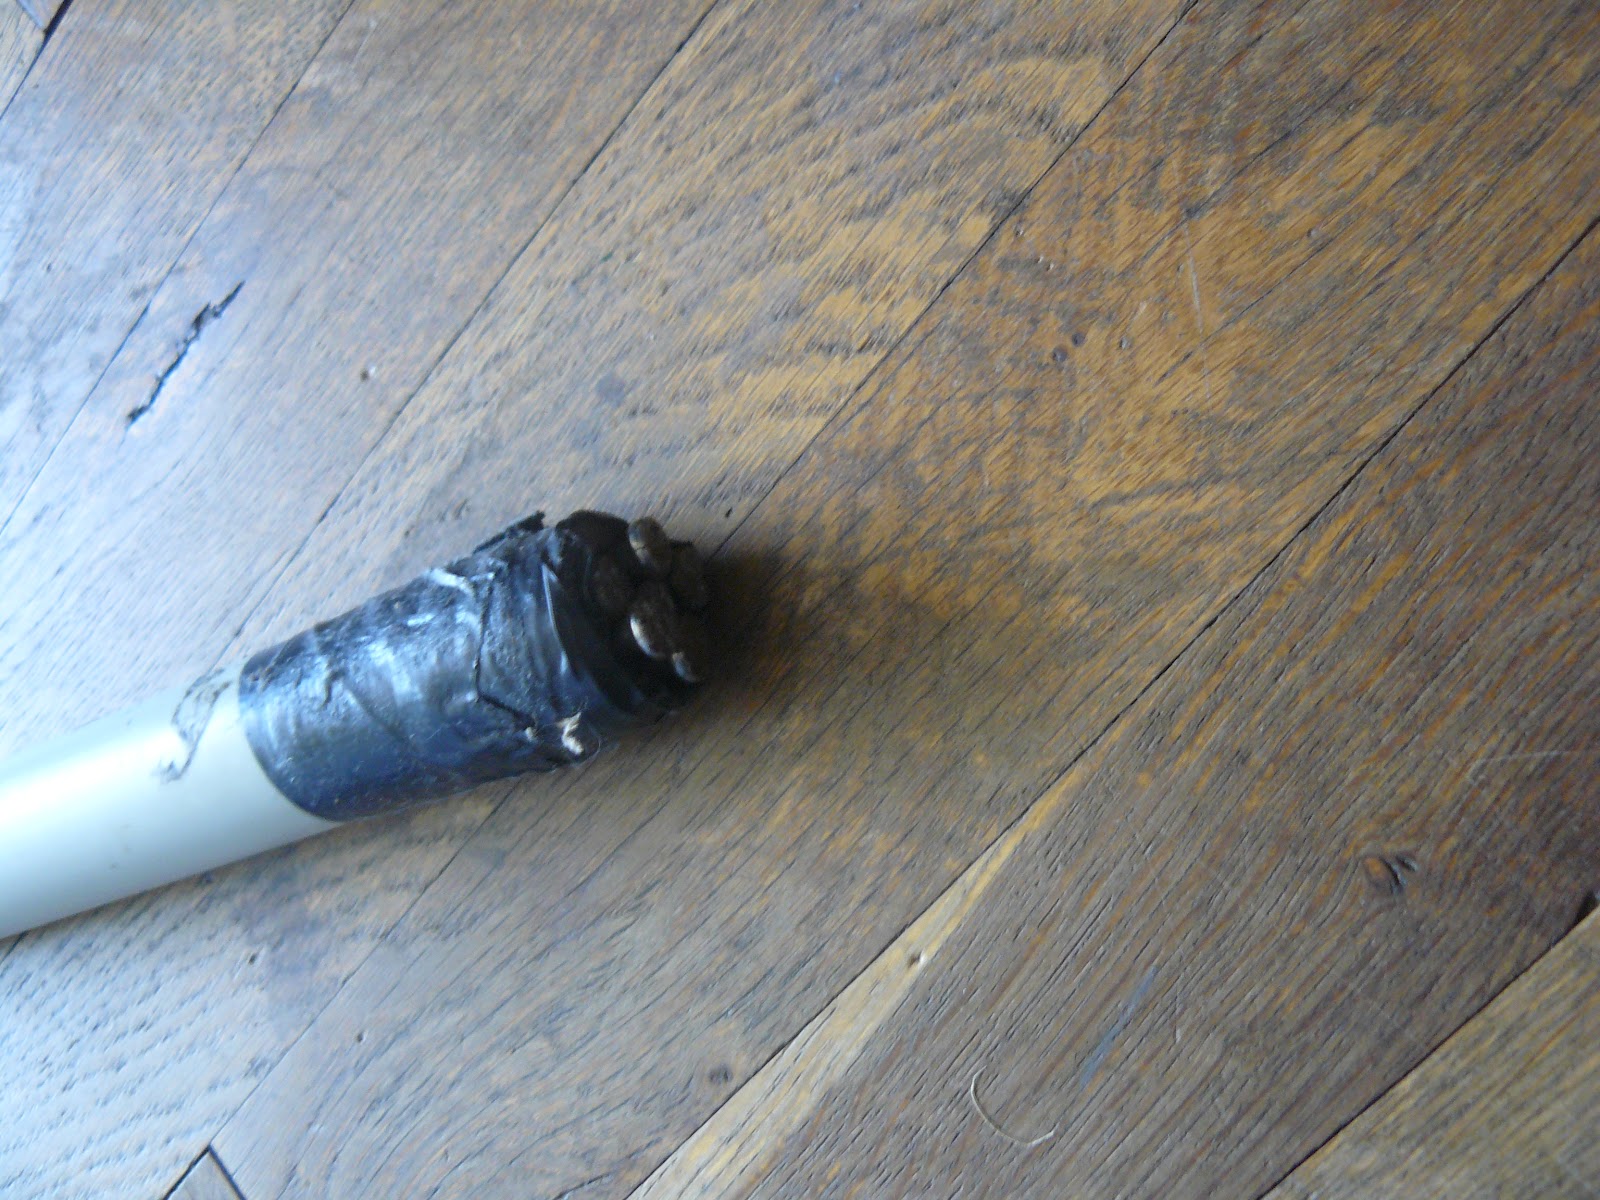
The axe already came with a counterweight fixed in. Note that the axe will have a frontal center of balance - its how it should be anyway - we are not making a sword after all. Still, a counterweight and pommel will help with easier control and handling. 

 After that scraps from flipflops that were turned into soft knives the week before, are taped to  the core. This will help with having a better grip and keeping your buddy safe from accidental hits with the pipe.


 The final piece added is a pommel from a water tap valve, full with large coins. Its enough to move the balance to the middle of the axe. You'll still deliver stronger blows than a sword.
 Wood texture wallpaper is placed ontop to finish the shaft. This time it didn't stick too well, unfortunately. Having a second pair of hands would have been invaluable.

 Finally some leather for the handle grip and we can move to the edge.
  
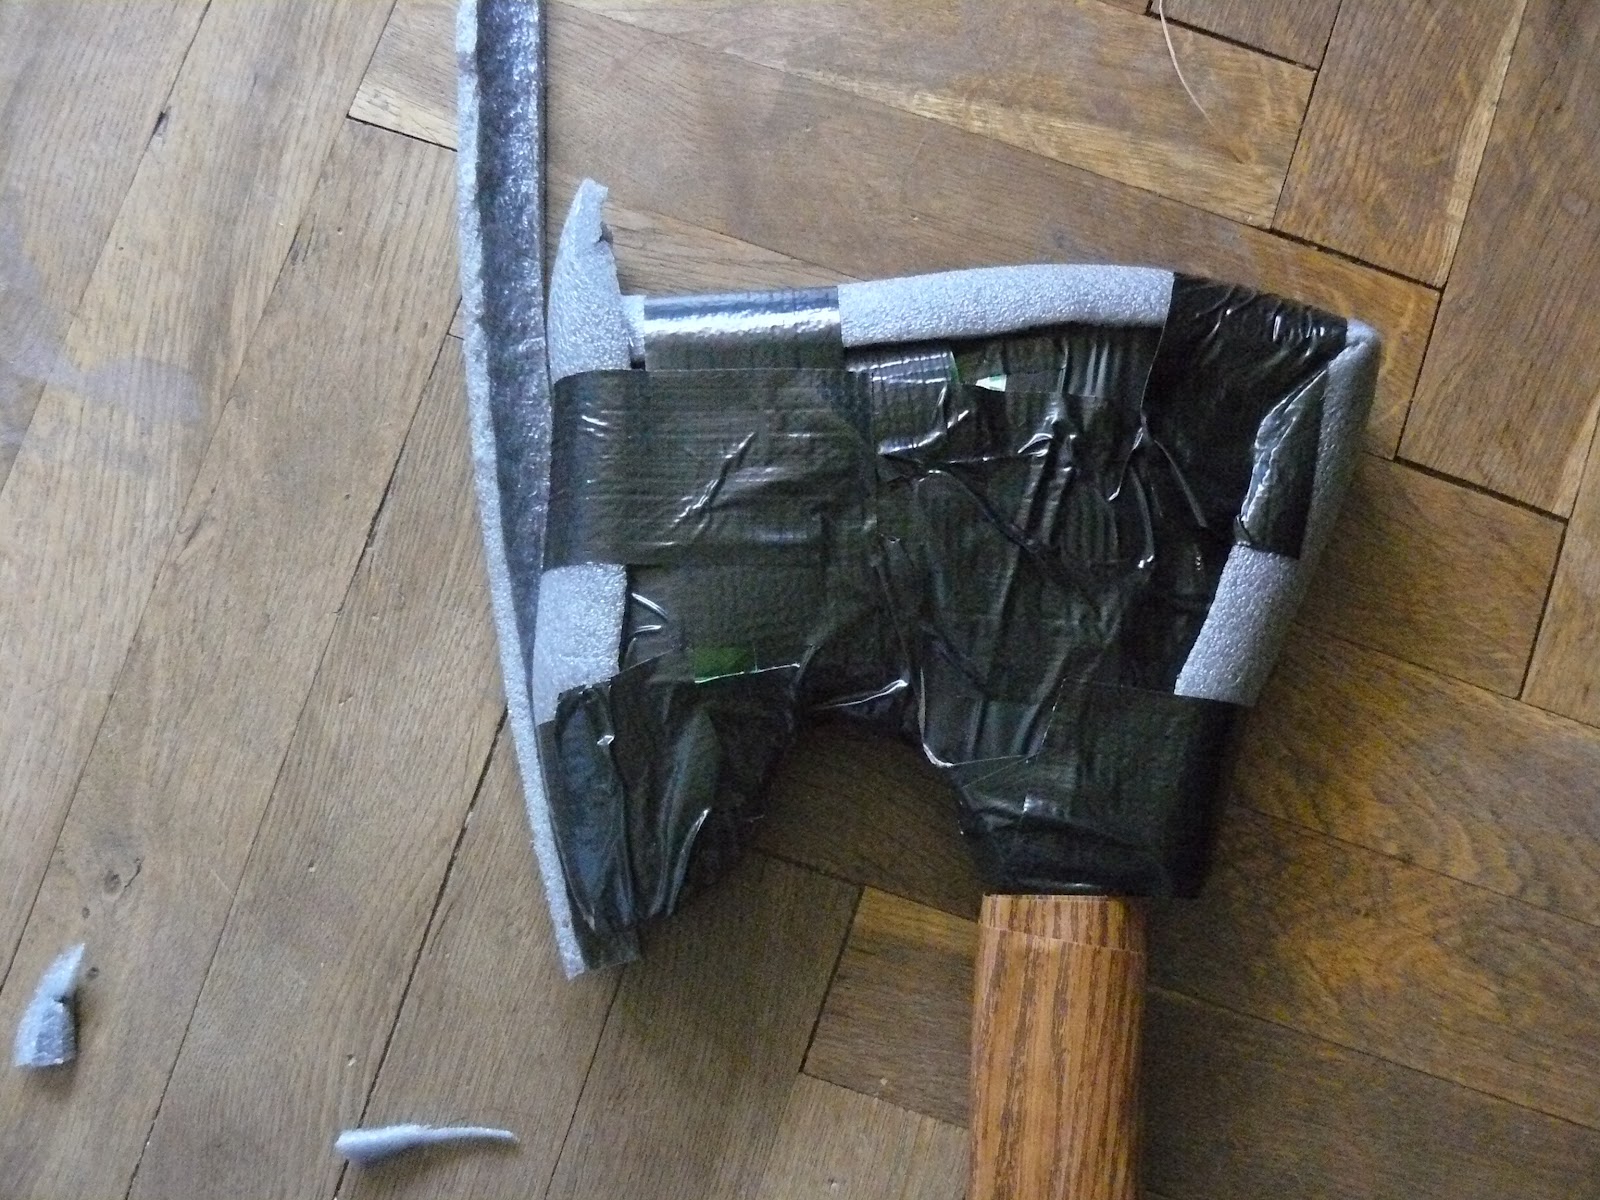
 The head has several layers of foam along the blade to compensate for the heavier head.
I eventually settled for 3, as well as 2 more for the rear of the axe. One thing I should have done is decorate the axe head, but I had nothing suitable for the job at the time. Maybe later. Last thing to do is put the aluminium foil on  and we are finished. 

Friday, 20 July 2012

How to make a larp boffer kukri

You know, because kukri are awesome  and gurkhas are awesome too. If you have one, you are awesome yourself by default(either a kukri or a gurkha).

Anyway, the kukri is perhaps the last still used curved blade in existence. Modern ones are smaller than the original, being all in all an oversized combat knife. Old kukris varied but at 40+ sm length, they fall right in the short sword category for me. Anyway

Larp boffer kukri. 

For the record, this is the first time I don't like how a new weapon turns out. The tip could have been better. 


I'm not going to give YET again the budget, tools and materials, since they are all the same as for other weapons around. One thing you should consider is how long you want your kukri - that is do you want a big knife or a short sword.

Anyway...

First things first. I decided to use 40something sm core for my kukri, which with tip and pommel would bring it close to half a meter. 
The core needs to get a roughly 20 degrees bend so we use the method described here.
Once its done we can start with the blade.
The blade itself is made in the same way as all other I've made so far.
 What is of note of course, is its more specific shape which can easily be achieved with extra layers of foam.
 After that its a rather mundane task to wrap it in tape and move to the handle piece right?


 First a piece of foam from a flip flop - it has density and durability and it will shape out the handle of the kukri.
 After that a few finishing touches with the paper knife and we are nearly finished.
Whats left to be done is by now standard procedure - wrap the handle in leather for better grip...
 A small pommel piece, just to keep the end of the leather firm and we are done.

 Chop chop!

Tuesday, 10 July 2012

How to make a larp boffer mace

You know, by now you should have picked the basics of making proper larp weapons instead of dickswords and such...Besides, a mace is the simplest possible one to make, I mean everyone can make a mace right? Its one of mankind's first weapons among with the sharpened stick and the thrown rock. But okay here's the way to get one.


HOMEMADE LARP BOFFER MACE


Budget - as usual - 10-15$ if you are starting fresh, the more weapons you make, the cheaper they will get.

Materials: Polypropylene pipe, foam, wood texture wallpaper, glue. Tapes.

Tools: Usual - scissors, paper knife,


First things first, get a roughly baton length piece of pipe.

Next we glue a layer of wood textured wallpaper and the shaft of the mace is ready to go.
After that its time to make the head. Since we are talking about a mace - you gotta make sure it has 360 degrees coverage - there is no edge to it. Also, don't make the head too short, you don't want to hit people with a naked pipe on the head. Same thing we did with the war hammer - give it a good safety length - better safe than sorry.
After the first layer of foam, lets add some extra as well as bonus bumps. Don't make it too complex - the more spikes and such you make, the easier it will be to get it damaged. If  you make something like Sauron's mace from the intro of Lord of the Rings: The fellowship of the Ring, chances are it won't last even a single fight.

Whatever shape of the head you've picked, its time to tape it up.

Finally an old cap from a bottle of pills to cover the other end so that it won't slip out of your hand accidentally. There, we are done, you can go clobber someone on the head.

Saturday, 16 June 2012

Recycling an old homemade larp boffer sword part 2

Previously on Buskador's LARP....

Last time we took this old torn boffer sword and gut it out like a fish. Now we are going to remake it.


While we already have a guide on Single edged swords this one will also serve as such for double edged swords. What we are going to get here is pretty much the classical "sword" stereotype, which everyone will be able to look at and say oh a medieval sword and be right. In other words - the Oakeshott type XII


From the old larp sword I kept only the core and the pommel, I decided to make a new sword guard piece eventually.Here we go!

Talking about sword guard, I decided to start with it, instead of making the blade first. For the guard I cut up two plastic bottles.

Then, I cut those in 6 strips of plastic and held them together with tape. From this I cut out the shape of the sword guard. We are using plastic bottles because they are far more durable than guards made from foam or cardboard. It will actually stop another sword from sliding down your blade so yes - it works too.


This is now fitted on the sword and two piece of foam and added to either end both for visuals and to keep the edges covered. The guard is tied firmly in its place with a piece of cable, same I retrieved when removing the old guard piece in part 1. Then its wrapped in tape and we move on for the time being.


Next thing on the list was hammering in a counter weight similar to the one shown here. After that the pommel is filled with screw to act as additional counter weight and fitted on.

Then we give the handle an oval shape by adding leftover bits of flip flops  from the making of the Advanced soft core larp knife. This will improve handling and keep you from hitting people with the flat.

 Finally - the outer shell is added. Leather is glued on for better grip and grey tape for better looks.
Now the pommel, handle and guard are finished and we only need to make the blade of the sword.
There is nothing special to it, its no different from the other swords I've made so far except that now both sides must be symmetric since we got a double edged sword here. 
Its important to pay attention to the tip especially if you plan on stabbing with it. I've inserted another piece of foam in the pipe itself

And after wrapping the blade, we are done. An old boffer is given new life and its ready for the summer games.